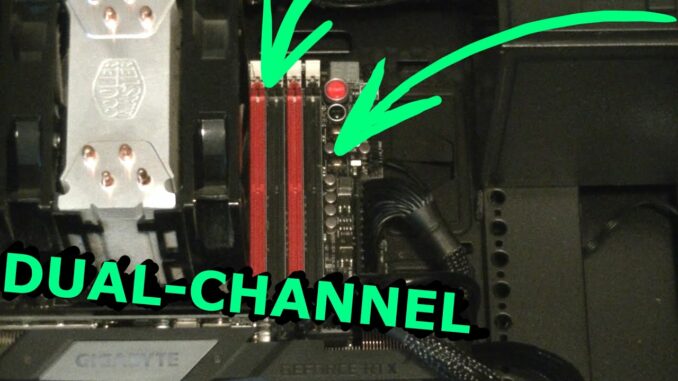
Setting up dual-channel RAM configuration can significantly boost your computer’s performance by increasing memory bandwidth. This detailed guide will walk you through the process of setting up dual-channel RAM on your motherboard, covering everything from understanding dual-channel memory to installing RAM modules and verifying configuration.
Table of Contents
- Introduction to Dual-Channel RAM
- What is Dual-Channel RAM?
- Benefits of Dual-Channel Configuration
- Pre-Installation Preparation
- Tools and Materials Needed
- Understanding Motherboard Compatibility
- Identifying Dual-Channel RAM Slots
- Locating RAM Slots on the Motherboard
- Reading Motherboard Manual
- Installing RAM Modules
- Steps for Installing RAM
- Ensuring Proper Insertion
- Verifying Dual-Channel Configuration
- Checking BIOS/UEFI Settings
- Using System Information Tools
- Testing and Benchmarking
- Running Memory Tests
- Monitoring Performance Gains
- Troubleshooting Dual-Channel Issues
- Common Problems and Solutions
- Rechecking Installation
- Conclusion
1. Introduction to Dual-Channel RAM
What is Dual-Channel RAM?
Dual-channel RAM refers to a technology that allows your computer’s memory controller to access two separate memory modules simultaneously, effectively doubling the data transfer rate between the RAM and the CPU. This setup requires pairing identical RAM modules in specific motherboard slots to optimize memory bandwidth and improve system performance.
Benefits of Dual-Channel Configuration
- Increased Memory Bandwidth: Doubles the potential data transfer rate between RAM and the CPU, enhancing system responsiveness and multitasking capabilities.
- Improved System Performance: Reduces memory latency and improves overall efficiency, particularly in memory-intensive applications and gaming.
- Cost-Effective Upgrade: Utilizes existing RAM modules for enhanced performance without needing to upgrade to higher capacity modules.
2. Pre-Installation Preparation
Tools and Materials Needed
- Identical RAM Modules: Ensure you have two identical RAM modules (same capacity, speed, and timings).
- Anti-static Wrist Strap: Prevents static discharge that could damage sensitive components.
- Motherboard Manual: Consult the manual for specific guidance on RAM installation and configuration.
Understanding Motherboard Compatibility
- Dual-Channel Support: Verify that your motherboard supports dual-channel memory configuration. This information is typically found in the motherboard’s specifications or manual.
- RAM Compatibility: Check compatibility of your RAM modules with your motherboard to ensure they are supported for dual-channel operation.
3. Identifying Dual-Channel RAM Slots
Locating RAM Slots on the Motherboard
- Inspect Motherboard: Identify the RAM slots on your motherboard. Most motherboards have RAM slots labeled (e.g., DIMM slots) near the CPU socket.
- Slot Configuration: RAM slots are often color-coded or labeled to indicate dual-channel pairs. Consult the motherboard manual for specific slot pairing information.
Reading Motherboard Manual
- Consult Manual: Refer to the motherboard manual for the correct placement of RAM modules to enable dual-channel mode. It will provide detailed instructions and illustrations for proper installation.
4. Installing RAM Modules
Steps for Installing RAM
- Power Off and Unplug: Shut down your computer and disconnect the power cable from the power supply unit (PSU) to prevent electrical damage.
- Prepare Motherboard: Place the motherboard on a stable surface and open the retention clips on the RAM slots.
- Align RAM Modules: Align the notch on the RAM module with the key in the RAM slot to ensure proper orientation.
- Insert RAM Modules: Gently but firmly press the RAM module into the slot until the retention clips click into place on both sides.
Ensuring Proper Insertion
- Firm Connection: Ensure the RAM module is fully seated in the slot with the retention clips securing it in place.
- Check Alignment: Verify that the notch on the RAM module matches the key in the RAM slot to prevent incorrect installation.
5. Verifying Dual-Channel Configuration
Checking BIOS/UEFI Settings
- Power On Your Computer: Boot into the BIOS/UEFI setup utility by pressing the designated key (often Del, F2, or Esc) during the startup process.
- Navigate to Memory Settings: Look for options related to memory configuration, often found under “Advanced” or “Memory” settings.
- Verify Dual-Channel Mode: Ensure that the RAM is detected in dual-channel mode. Some BIOS/UEFI versions may display this information directly.
Using System Information Tools
- Operating System Tools: In Windows, use tools like Task Manager or CPU-Z to verify the memory configuration and ensure both RAM modules are recognized and operating in dual-channel mode.
- Third-Party Software: Tools like AIDA64 or HWiNFO can provide detailed information about memory configuration and performance metrics.
6. Testing and Benchmarking
Running Memory Tests
- Memory Testing Software: Use programs like MemTest86 or Windows Memory Diagnostic to perform thorough memory tests.
- Stress Testing: Run benchmarks and stress tests to measure system performance before and after setting up dual-channel RAM.
Monitoring Performance Gains
- Compare Benchmarks: Use benchmarking tools to compare system performance metrics, such as memory bandwidth and latency, before and after enabling dual-channel mode.
- Real-world Performance: Assess improvements in application loading times, multitasking responsiveness, and gaming performance with dual-channel RAM configuration.
7. Troubleshooting Dual-Channel Issues
Common Problems and Solutions
- Mismatched RAM Modules: Ensure both RAM modules are identical in capacity, speed, and timings to avoid compatibility issues.
- Improper Installation: Recheck RAM installation to ensure modules are firmly seated in the correct slots for dual-channel operation.
- BIOS/UEFI Update: Update motherboard BIOS/UEFI firmware to the latest version to resolve compatibility issues and improve memory management.
Rechecking Installation
- Visual Inspection: Double-check RAM module placement and ensure they are securely seated with retention clips engaged.
- Verify Configuration: Use BIOS/UEFI settings or system information tools to confirm dual-channel mode activation.
8. Conclusion
Setting up dual-channel RAM is a straightforward process that can significantly enhance your computer’s performance by increasing memory bandwidth and efficiency. By following this comprehensive guide, you can successfully install and configure dual-channel RAM on your motherboard, ensuring optimal system responsiveness and multitasking capabilities. Remember to consult your motherboard manual, use compatible RAM modules, and verify proper installation through BIOS/UEFI settings or system information tools. With dual-channel RAM configuration, you’ll experience improved performance in gaming, content creation, and everyday computing tasks, maximizing the capabilities of your PC’s memory subsystem for a smoother and more responsive user experience.