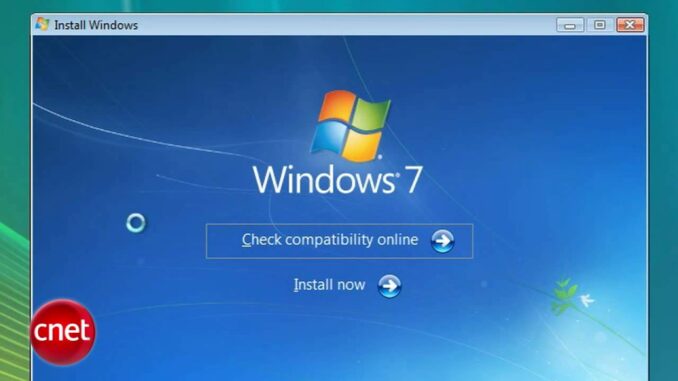
Introduction to Upgrading to Windows 7
Upgrading to Windows 7 from an older version, such as Windows Vista or Windows XP, can breathe new life into your computer with improved stability, enhanced security features, and a more intuitive user interface. Before beginning the upgrade process, it’s essential to ensure your computer meets the minimum requirements for Windows 7 and that you have a valid product key for activation.
Preparation
Before you begin upgrading to Windows 7, make sure you have the following:
- System Requirements:
- Check that your computer meets the minimum hardware requirements for Windows 7:
- 1 GHz or faster processor (32-bit or 64-bit)
- 1 GB RAM (32-bit) or 2 GB RAM (64-bit)
- 16 GB available hard disk space (32-bit) or 20 GB (64-bit)
- DirectX 9 graphics device with WDDM 1.0 or higher driver
- Check that your computer meets the minimum hardware requirements for Windows 7:
- Backup Important Data:
- Perform a full backup of your important files and documents to an external storage device or cloud service. The upgrade process may result in data loss, so it’s crucial to have a backup.
- Internet Connection:
- While not required during installation, having an internet connection allows you to download updates and drivers after upgrading to Windows 7.
- Windows 7 Installation Media:
- Obtain a Windows 7 installation DVD or create a bootable USB drive with the Windows 7 ISO file. You can download the ISO file from the Microsoft website if you have a valid product key.
- Product Key:
- Ensure you have a valid Windows 7 product key. This is usually found on a sticker on your computer or included with your Windows 7 purchase.
Step-by-Step Guide to Upgrade to Windows 7
Step 1: Check Compatibility
- Run Upgrade Advisor:
- Download and run the Windows 7 Upgrade Advisor tool from the Microsoft website. This tool scans your computer and checks for hardware and software compatibility issues that may affect the upgrade process.
- Resolve Compatibility Issues:
- Review the Upgrade Advisor report and address any compatibility issues identified, such as outdated drivers or incompatible software. Visit the manufacturer’s website to download updated drivers or patches.
Step 2: Back Up Your Data
- Perform Full Backup:
- Copy your important files, documents, and settings to an external storage device or cloud service. Use Windows Backup and Restore or third-party backup software for a comprehensive backup.
Step 3: Obtain Windows 7 Installation Media
- Download or Purchase Installation Media:
- Download the Windows 7 ISO file from the Microsoft website if you have a product key. Alternatively, purchase a Windows 7 installation DVD from a retail store or online retailer.
Step 4: Insert Installation Media
- Insert DVD or USB Drive:
- Insert the Windows 7 installation DVD into your computer’s optical drive. If you are using a USB drive, insert it into a USB port.
Step 5: Start Windows 7 Upgrade
- Boot from Installation Media:
- Restart your computer and boot from the Windows 7 installation media. You may need to access the BIOS/UEFI settings and set the DVD drive or USB drive as the first boot device.
- Begin Windows 7 Setup:
- Follow the on-screen prompts to start the Windows 7 Setup process. Select your language, time, currency format, and keyboard or input method, then click “Next.”
- Click Install Now:
- On the next screen, click “Install Now” to begin the upgrade process.
Step 6: Enter Product Key
- Enter Product Key:
- Enter your 25-character product key for Windows 7. Click “Next” to continue.
Step 7: Accept License Terms
- Accept License Terms:
- Read the Microsoft Software License Terms and check the box next to “I accept the license terms.” Click “Next.”
Step 8: Choose Upgrade Installation
- Select Upgrade:
- Choose the “Upgrade” option to keep your files, settings, and applications intact. Windows will check compatibility and prepare for the upgrade.
Step 9: Complete Upgrade
- Begin Upgrade Process:
- Windows 7 will now start the upgrade process. This may take some time, depending on the speed of your computer and the amount of data being transferred.
- Follow On-Screen Prompts:
- Follow the on-screen prompts to complete the installation. Your computer may restart multiple times during the upgrade process.
Step 10: Post-Upgrade Tasks
- Install Drivers and Updates:
- After upgrading to Windows 7, install updated drivers for your hardware components, such as graphics cards, network adapters, and printers. Use Windows Update to download and install the latest updates.
- Activate Windows:
- Once installation is complete and you are connected to the internet, activate Windows 7 using your product key. Follow the prompts to complete activation.
Step 11: Restore Backed-Up Data
- Restore Files and Settings:
- Use Windows Backup and Restore or your chosen backup solution to restore your backed-up files, documents, and settings to their original locations.
Step 12: Enjoy Windows 7
- Explore Windows 7:
- Once activated, you can start using Windows 7 and exploring its features, such as the Start Menu, Taskbar, Windows Explorer, and built-in applications.
Conclusion
Upgrading to Windows 7 from an older version involves thorough preparation, ensuring compatibility, and following a systematic installation process. By following this step-by-step guide and taking necessary precautions, you can successfully upgrade to Windows 7 and enjoy its enhanced features and performance on your computer.
Always refer to specific instructions provided by Microsoft or your computer manufacturer for detailed guidance and troubleshooting tips tailored to your hardware and upgrade scenario.