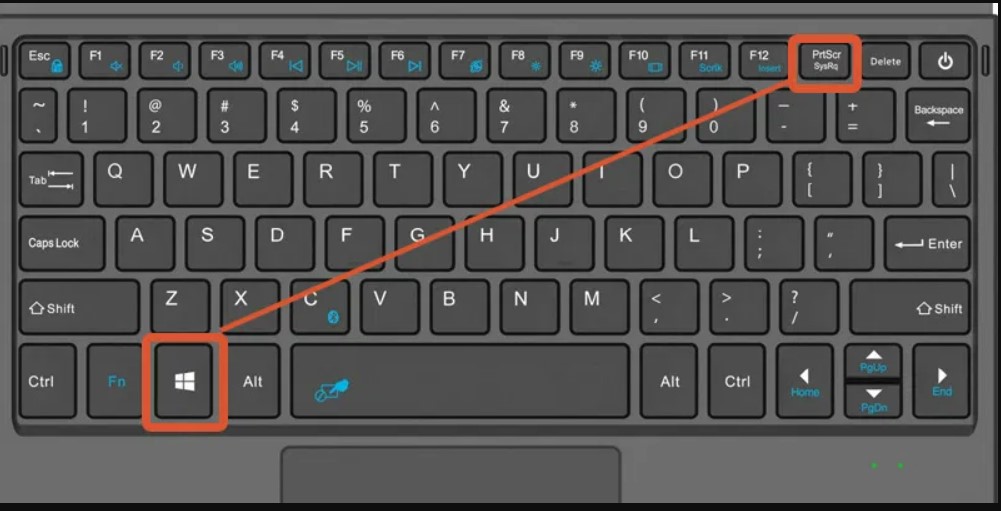
Screenshots are invaluable tools for capturing and sharing information, troubleshooting technical issues, creating tutorials, and preserving digital memories. In Windows 10, users have access to a variety of methods for taking screenshots, each offering unique features and capabilities to suit different needs and preferences. In this extensive guide, we’ll explore five ways to take screenshots in Windows 10, covering built-in tools, keyboard shortcuts, third-party software, and advanced techniques to help you capture your screen with ease and precision.
1. Using the Print Screen Key: The Print Screen (PrtScn) key is a versatile tool for capturing the entire screen or specific windows in Windows 10. Here’s how to use it:
- To capture the entire screen, press the PrtScn key. The screenshot will be copied to the clipboard.
- To capture the active window, press Alt + PrtScn. The screenshot of the active window will be copied to the clipboard.
- To save the screenshot as an image file, paste it into an image editing program such as Paint or Photoshop and save it.
2. Using the Snipping Tool: The Snipping Tool is a built-in screenshot utility in Windows 10 that allows users to capture custom-shaped screenshots and annotate them. Here’s how to use it:
- Open the Snipping Tool by typing “Snipping Tool” in the search bar and selecting it from the search results.
- Click on “New” to start a new snip.
- Drag the cursor to select the area you want to capture.
- Once captured, you can annotate the screenshot with highlights, arrows, text, and more.
- Click on “File” > “Save As” to save the screenshot as an image file.
3. Using the Snip & Sketch Tool: The Snip & Sketch tool is an updated version of the Snipping Tool in Windows 10, offering additional features and integration with the Windows Ink workspace. Here’s how to use it:
- Open the Snip & Sketch tool by typing “Snip & Sketch” in the search bar and selecting it from the search results.
- Click on “New” to start a new snip.
- Select the type of snip you want (rectangular, freeform, window, or fullscreen).
- Drag the cursor to select the area you want to capture.
- Once captured, you can annotate the screenshot with various tools and options.
- Click on the disk icon to save the screenshot as an image file.
4. Using the Windows + Shift + S Shortcut: Windows 10 introduced a new screenshot shortcut, Windows + Shift + S, which allows users to capture a portion of the screen and copy it to the clipboard. Here’s how to use it:
- Press Windows + Shift + S simultaneously.
- The screen will dim, and the cursor will change to a crosshair.
- Click and drag to select the area you want to capture.
- The screenshot will be copied to the clipboard, and you can paste it into an image editing program to save it.
5. Using Game Bar (for Games and Apps): The Game Bar in Windows 10 allows users to capture screenshots and record gameplay footage while playing games or using other applications. Here’s how to use it:
- Press Windows + G to open the Game Bar while playing a game or using an application.
- Click on the camera icon to capture a screenshot.
- Alternatively, you can press Windows + Alt + PrtScn to capture the entire screen as a screenshot.
- The screenshots will be saved to the Captures folder in the Videos library by default.
Conclusion: In conclusion, Windows 10 offers a variety of methods for taking screenshots, ranging from simple keyboard shortcuts to advanced snipping tools and integrated utilities. Whether you’re capturing the entire screen, specific windows, or custom-shaped areas, mastering the various screenshot methods empowers you to capture and share information effectively. By familiarizing yourself with these five ways to take screenshots in Windows 10 and understanding their features and capabilities, you can elevate your screen capture game and streamline your workflow. So go ahead, explore these screenshot methods, and unleash your creativity and productivity in Windows 10!