Introduction:
In the expansive universe of digital design, Adobe Illustrator serves as a powerful ally, offering a vast array of tools and features to bring creative visions to life with precision and finesse. Among its arsenal of capabilities, the appearance panel emerges as a versatile powerhouse, providing artists and designers with a wealth of options to manipulate and enhance the appearance of their artwork. Whether you’re a seasoned illustrator or an aspiring designer, understanding how to effectively utilize the appearance panel in Adobe Illustrator is crucial for unlocking new realms of creativity. In this comprehensive guide, we’ll embark on a journey to explore the intricacies of the appearance panel, from its basic functionalities to advanced techniques for creating captivating artwork.
Chapter 1: Introducing the Appearance Panel
At its core, the appearance panel in Adobe Illustrator is a central hub where users can access and manipulate the visual attributes of selected objects or artwork. From adjusting stroke and fill properties to applying effects and styles, the appearance panel offers a wide range of options to customize and enhance the appearance of artwork. By understanding how to harness the power of the appearance panel, artists and designers can elevate their creations to new heights of visual sophistication and impact.
Chapter 2: Navigating the Appearance Panel Interface
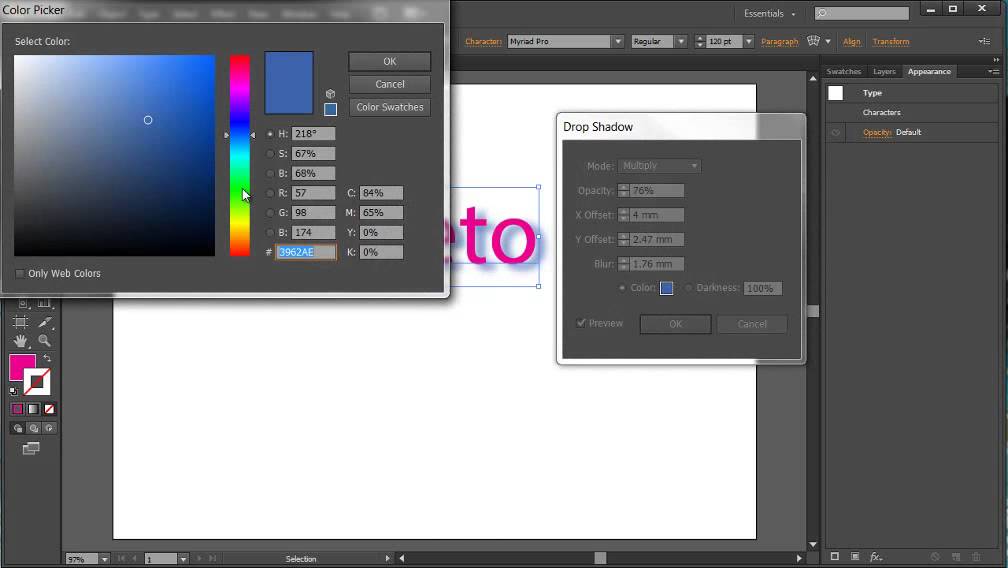
Before diving into advanced techniques, it’s important to familiarize yourself with the interface of the appearance panel in Adobe Illustrator. Located within the “Window” menu, the appearance panel can be accessed by selecting “Appearance” or by using the keyboard shortcut Shift+F6. Upon opening the appearance panel, you’ll be greeted with a list of visual attributes and effects applied to the selected object(s), organized in a hierarchical manner. Take some time to explore the various options and familiarize yourself with the layout and functionality of the appearance panel.
Chapter 3: Manipulating Stroke and Fill Properties
One of the primary functions of the appearance panel is to control the stroke and fill properties of selected objects or artwork. With the appearance panel, users can easily adjust the color, opacity, width, and style of strokes and fills to achieve desired effects. Experiment with different stroke and fill settings to create bold outlines, subtle gradients, and intricate textures. Use the “Add New Stroke” or “Add New Fill” buttons within the appearance panel to apply multiple strokes or fills to an object, allowing for greater versatility and creativity in your designs.
Chapter 4: Applying Effects and Styles
In addition to stroke and fill properties, the appearance panel offers a wide range of effects and styles that can be applied to selected objects or artwork. From basic effects such as drop shadows, glows, and blurs to more advanced options such as 3D extrusions and graphic styles, the appearance panel provides endless possibilities for enhancing the visual impact of your designs. Experiment with different effects and styles, and use the appearance panel to adjust their settings and parameters to achieve the desired look and feel.
Chapter 5: Creating and Managing Graphic Styles
One of the most powerful features of the appearance panel is the ability to create and apply graphic styles to selected objects or artwork. Graphic styles allow users to save combinations of appearance attributes and effects as reusable presets, making it easy to apply consistent styling across multiple objects or projects. To create a graphic style, simply select an object with the desired appearance attributes, click the “New Graphic Style” button in the appearance panel, and give your style a name. Once created, graphic styles can be applied to other objects with a single click, saving time and streamlining your workflow.
Chapter 6: Exploring Advanced Techniques
For seasoned Adobe Illustrator users looking to take their skills to the next level, the appearance panel offers a wealth of advanced techniques and features to explore. Experiment with using live effects and symbols in conjunction with the appearance panel to create dynamic and interactive artwork. Utilize the appearance panel’s transparency settings to create layered compositions and subtle blending effects. Explore the possibilities of using appearance attributes to create complex textures, patterns, and illustrations that push the boundaries of digital design.
Chapter 7: Saving and Exporting Artwork
Once you’ve applied the desired appearance attributes and effects to your artwork using the appearance panel in Adobe Illustrator, it’s important to save and export your work for sharing or further editing. Save your Illustrator document in a compatible file format, such as AI or PDF, to preserve the vector properties of your artwork. If you’re creating artwork for web or screen-based applications, consider exporting your artwork as SVG files for scalability and compatibility with web browsers. For print-based projects, export your artwork as high-resolution raster images in formats such as JPEG or PNG.
Conclusion:
Mastering the appearance panel in Adobe Illustrator is a journey of exploration and experimentation, offering endless possibilities for manipulating and enhancing the visual attributes of your artwork. By understanding the basic functionalities, navigating the interface, manipulating stroke and fill properties, applying effects and styles, creating and managing graphic styles, exploring advanced techniques, and saving and exporting your artwork, you’ll be able to unlock new realms of creativity and bring your artistic visions to life with unparalleled precision and finesse. So dive into the world of the appearance panel, unleash your imagination, and let your creativity soar as you create captivating artwork that leaves a lasting impression.