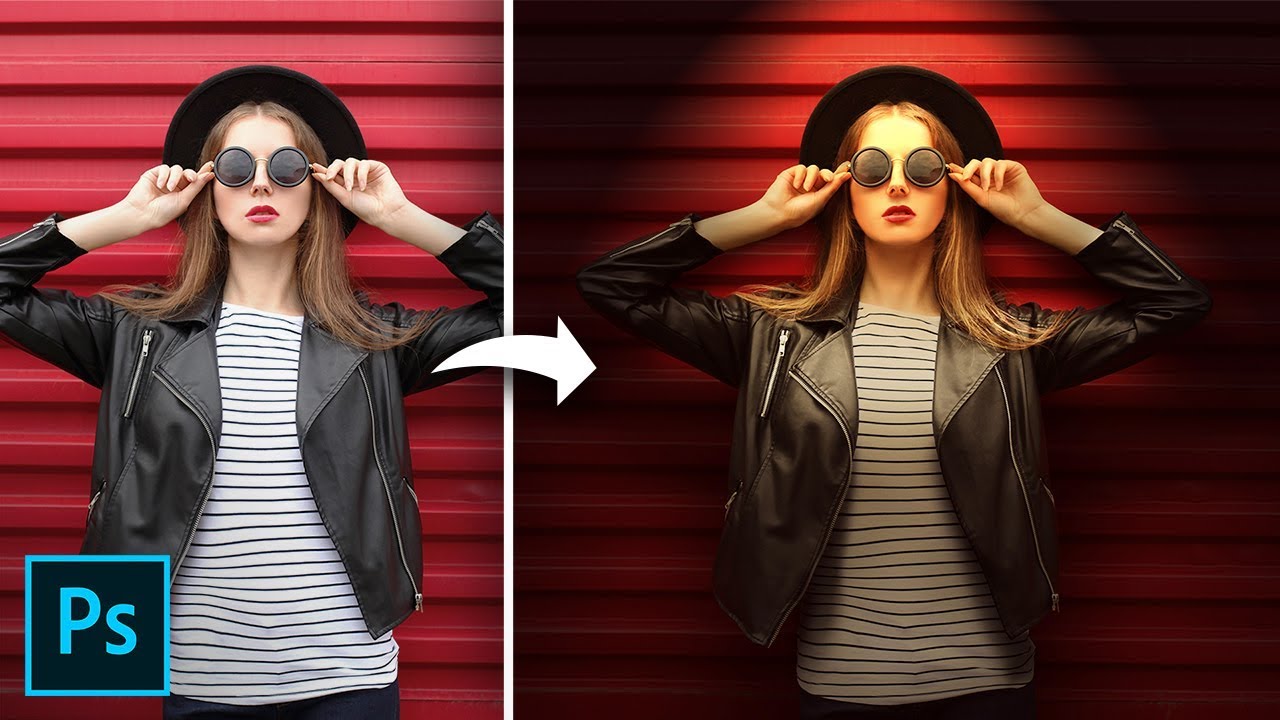
Introduction:
In the realm of digital artistry and graphic design, the interplay between light and focus is a powerful tool for crafting visually stunning and emotionally resonant compositions. The Focus with Light Photoshop effect is a technique that allows artists and designers to draw attention to specific elements, create dynamic focal points, and evoke a sense of depth and atmosphere. This comprehensive guide will navigate through the intricacies of achieving the Focus with Light effect in Adobe Photoshop, unlocking the potential to infuse your images with captivating luminosity and artistic brilliance.
Section 1: Setting the Stage
Before delving into the creative process, open Adobe Photoshop and import the image you wish to enhance with the Focus with Light effect. Choose an image with strong composition and distinct elements, as this effect thrives on emphasizing and directing attention to specific areas within the frame.
Section 2: Understanding the Importance of Light and Focus
Light is a fundamental element in visual storytelling, and its interplay with focus can dramatically influence the viewer’s perception. By strategically manipulating light and focus, you can guide the audience’s gaze, highlight essential details, and evoke specific emotions. The Focus with Light effect is a dynamic way to harness these elements and elevate the impact of your images.
Section 3: Duplicate and Prepare the Image
To preserve the original image and work non-destructively, start by duplicating the background layer. This duplicated layer will serve as the foundation for applying the Focus with Light effect. Make any necessary adjustments to enhance the overall brightness, contrast, and color balance to create a visually appealing base.
Section 4: Selective Focus with Gaussian Blur
The core of the Focus with Light effect lies in selectively applying Gaussian Blur to specific areas of the image. Create a mask on the duplicated layer and use the Brush tool to paint over the regions you want to emphasize. Apply a Gaussian Blur filter to the masked areas, adjusting the radius to control the intensity of the blur. This step mimics the depth of field found in photography, where certain elements are deliberately out of focus.
Section 5: Introducing Light Sources
To enhance the illusion of focused light, introduce virtual light sources in your composition. Create new layers and use the Brush tool to paint with a soft, low-opacity brush in areas where the light would naturally fall. Experiment with different colors to evoke specific moods – warm tones for a cozy atmosphere, cool tones for a serene ambiance.
Section 6: Adjusting Blend Modes and Opacity
Blend modes play a crucial role in seamlessly integrating the Focus with Light effect into your image. Experiment with blending modes such as Overlay, Soft Light, or Screen to achieve a natural interaction between the focused areas and the rest of the image. Fine-tune the opacity of the light layers to control their subtlety and ensure a harmonious balance.
Section 7: Enhancing Details with Dodge and Burn
To further accentuate the Focus with Light effect, use the Dodge and Burn tools to enhance details and create contrast. Dodge areas that are illuminated by the virtual light sources, and burn areas where shadows would naturally fall. This step adds dimension and refinement to the illuminated portions, enhancing the overall impact of the effect.
Section 8: Color Grading for Atmosphere
Color grading plays a pivotal role in shaping the atmosphere of your composition. Experiment with adjustment layers such as Color Balance, Photo Filter, or Gradient Map to refine the color palette. Tailor the hues to complement the mood you want to convey, ensuring a cohesive and visually captivating result.
Section 9: Adding Additional Elements for Depth
To further enhance the depth of your composition, consider adding additional elements that respond to the Focus with Light effect. This may include particles, lens flares, or subtle textures that interact with the illuminated areas. Experiment with layer styles and blending modes to seamlessly integrate these elements into the overall aesthetic.
Section 10: Refining and Iterating
As you near completion, take a step back to assess the overall impact of the Focus with Light effect. Fine-tune details, adjust layer opacities, and iterate on different versions to explore various possibilities. Consider seeking feedback or taking breaks to approach the refinement process with a fresh perspective.
Section 11: Saving and Showcasing Your Illuminated Masterpiece
Once satisfied with the Focus with Light effect, save your masterpiece. Consider creating different versions with varying light intensities, colors, or compositions to showcase the versatility of your creation. Share your illuminated artwork on digital platforms, print it for exhibitions, or incorporate it into your portfolio to highlight your mastery of this captivating Photoshop effect.
Conclusion:
The Focus with Light Photoshop effect is a transformative technique that invites artists and designers to play with luminosity, focus, and atmosphere. This comprehensive guide has provided a detailed roadmap for navigating through the steps of achieving this effect, from duplicating and preparing the image to refining and showcasing the final masterpiece. As you continue to explore the endless possibilities of Focus with Light, let your creativity shine and illuminate your digital creations with a touch of artistic brilliance.