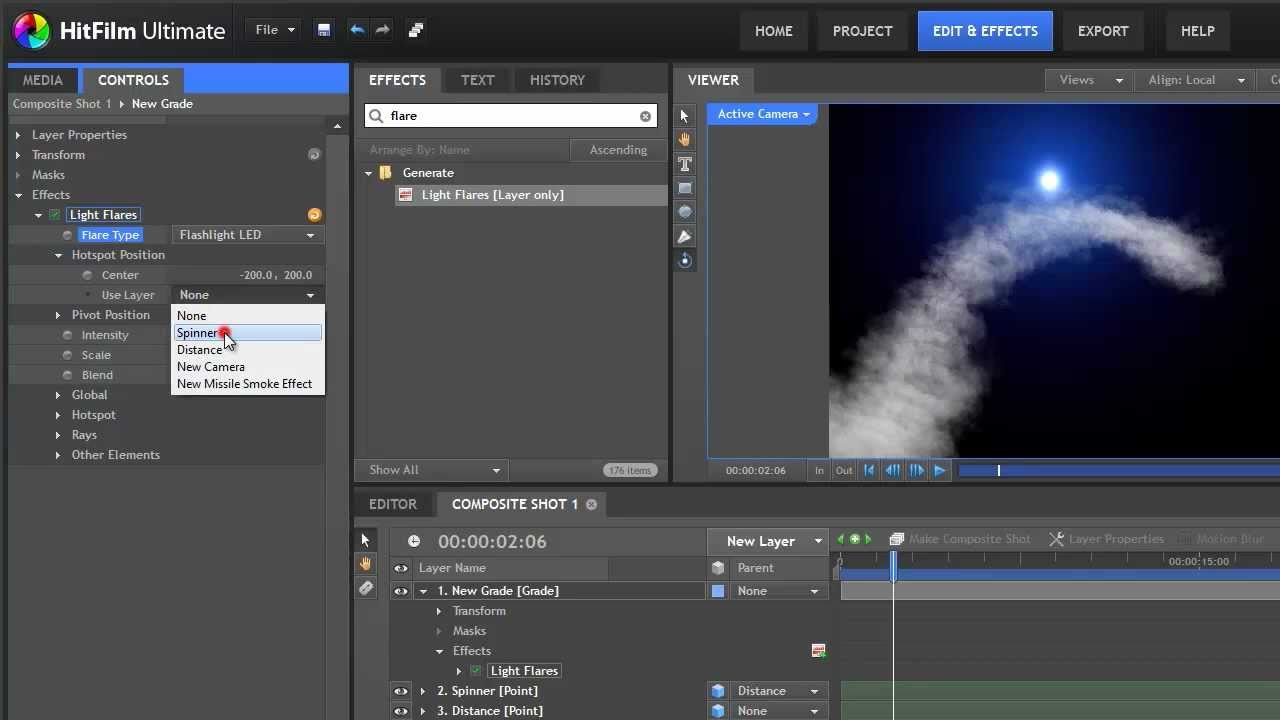
Introduction: Adding smoke effects to your videos can greatly enhance their visual appeal and create atmosphere, drama, or mystery. HitFilm Express, a powerful video editing and compositing software, offers users the ability to incorporate realistic and customizable smoke effects into their projects. In this comprehensive guide, we will explore the step-by-step process of adding smoke effects in HitFilm Express, from importing footage to fine-tuning the smoke parameters for professional-quality results.
Understanding Smoke Effects: Smoke effects are commonly used in filmmaking and video production to evoke various emotions and enhance the visual storytelling of a scene. Whether you’re simulating smoke from a fire, steam from a hot beverage, or fog in a mysterious setting, smoke effects can add depth, texture, and realism to your videos. HitFilm Express provides users with a variety of smoke effects, including particle simulations, stock footage overlays, and procedural effects, allowing for creative freedom and versatility in achieving the desired look and feel.
Step 1: Importing Footage into HitFilm Express Begin by launching HitFilm Express and creating a new project. Import the footage that you want to add smoke effects to by clicking on the Import button in the Media panel and selecting the desired video files from your computer. Alternatively, you can drag and drop the video files directly into the Media panel. Ensure that the footage is properly organized and arranged in the Media panel for easy access during the editing process.
Step 2: Adding the Smoke Effect Once the footage is imported into HitFilm Express, it’s time to add the smoke effect. Navigate to the Effects panel by clicking on the Effects button in the top-left corner of the interface. In the Effects panel, search for the “Smoke” category and browse through the available smoke effects. HitFilm Express offers a variety of smoke effects, including particle simulations, stock footage overlays, and procedural effects. Select the desired smoke effect and drag it onto the video layer in the timeline where you want the smoke to appear.
Step 3: Customizing the Smoke Effect After adding the smoke effect to the video layer, customize its appearance and behavior to achieve the desired look and feel. Select the video layer with the smoke effect applied in the timeline, then navigate to the Controls panel to access the effect’s parameters. Depending on the type of smoke effect you’ve chosen, you may have options to adjust parameters such as density, opacity, color, speed, and direction of the smoke. Experiment with different settings to achieve the desired intensity, movement, and style of the smoke effect.
Step 4: Blending the Smoke Effect To seamlessly integrate the smoke effect into the footage, adjust its blending mode and opacity to blend it with the underlying layers. Select the video layer with the smoke effect applied in the timeline, then navigate to the Controls panel to access the blending options. Experiment with different blending modes, such as Screen or Add, to composite the smoke effect over the footage while preserving the highlights and shadows. Additionally, adjust the opacity slider to control the overall transparency of the smoke effect and fine-tune its integration with the footage.
Step 5: Masking and Compositing (Optional) For more advanced smoke effects, you may need to use masking and compositing techniques to isolate the smoke and integrate it seamlessly with the scene. Use HitFilm Express’ masking tools to create masks around the areas where you want the smoke to appear or disappear. Feather the edges of the masks to create smooth transitions between the smoke and the surrounding elements. Apply blending modes and opacity adjustments to the masked layers to composite the smoke effect convincingly with the footage.
Step 6: Previewing and Adjusting the Result After customizing and blending the smoke effect with the footage, preview the result in the viewer window to assess the overall look and feel. Pay attention to the appearance, movement, and interaction of the smoke with the scene, as well as its impact on the visual narrative and mood. Make any necessary adjustments or refinements to the smoke effect based on your preferences and the specific requirements of your project.
Step 7: Rendering and Exporting the Final Result Once you’re satisfied with the smoke effect applied to the footage, it’s time to render the final result. Navigate to the Export tab in HitFilm Express and configure the export settings, including resolution, format, and output destination. Click on the Export button to render the composition and generate the final video with the smoke effect applied. Monitor the rendering progress and review the exported video to ensure that the smoke effect appears as intended.
Tips and Best Practices:
- Experiment with different smoke effects and settings to achieve a variety of looks and styles that complement the mood and aesthetic of your video project.
- Pay attention to the lighting and composition of the scene when adding smoke effects to ensure consistency and realism.
- Combine smoke effects with other visual elements, such as fire, sparks, or debris, to create more dynamic and immersive effects.
- Use multiple layers of smoke effects with varying densities and opacities to create depth and complexity in the scene.
- Regularly preview the smoke effect in the context of the scene to assess its integration and make any necessary adjustments or refinements.
Conclusion: Adding smoke effects in HitFilm Express is a creative and versatile technique that allows you to enhance the visual appeal and atmosphere of your videos. By following the step-by-step process outlined in this guide and experimenting with different settings and techniques, you can achieve professional-quality results that elevate the overall quality and impact of your video projects. Whether you’re creating cinematic sequences, visual effects, or motion graphics, HitFilm Express offers powerful tools and features for adding smoke effects that enhance the storytelling and immerse viewers in the world of your imagination. With practice, experimentation, and creativity, you can master the art of adding smoke effects in HitFilm Express and unlock endless possibilities for creating stunning and captivating videos.