Introduction:
Understanding the tone curve is a fundamental aspect of advanced photo editing, offering photographers unparalleled control over the tonal range and contrast in their images. While it might sound complex, mastering the tone curve is an essential skill that can significantly elevate your photography. In this quick 5-minute guide, we will demystify the tone curve, exploring its basics, functions, and how it can empower you to enhance the visual impact of your photos.
I. What is the Tone Curve?
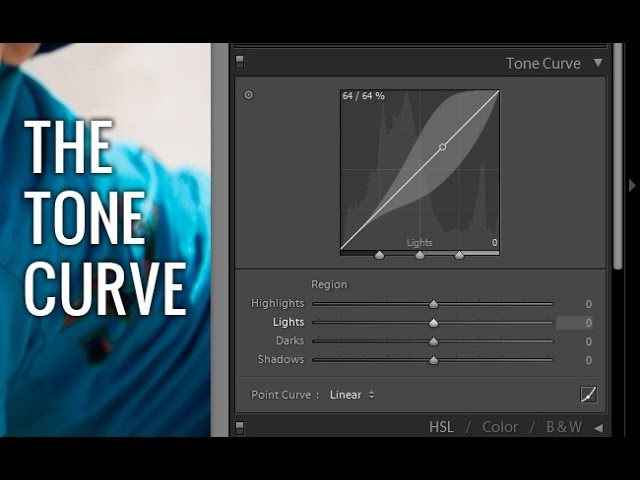
The tone curve is a graphical representation of the tonal values in an image, ranging from shadows to highlights. In photo editing software like Adobe Lightroom or Photoshop, the tone curve allows users to adjust the brightness and contrast of an image with precision.
A. Components of the Tone Curve:
- X-Axis (Horizontal): Represents the input tonal values, ranging from shadows on the left to highlights on the right.
- Y-Axis (Vertical): Represents the output tonal values, indicating the brightness or darkness of the tones.
B. Types of Tone Curves:
- Linear Tone Curve: A straight line from the bottom-left to the top-right, maintaining the original tonal relationships in the image.
- S-Curve: A common adjustment involving a gentle “S” shape, enhancing contrast by darkening shadows and brightening highlights.
II. Adjusting the Tone Curve:
The tone curve can be adjusted using control points, allowing photographers to fine-tune the tonal values in specific regions of the image.
A. Adding Control Points:
- Shadows: Dragging a point downward darkens the shadows, adding depth and richness.
- Midtones: Adjusting the middle portion of the curve affects midtones, influencing the overall brightness.
- Highlights: Raising a point brightens the highlights, adding luminosity to well-exposed areas.
B. Creating an S-Curve for Contrast:
- Contrast Enhancement: To enhance contrast, create an S-curve by adding points to the shadows and highlights, pulling them in opposite directions.
- Fine-Tuning: Adjust the steepness of the curve for subtle or dramatic contrast enhancements.
III. Targeted Adjustments with the Tone Curve:
The tone curve allows for targeted adjustments, enabling photographers to focus on specific tonal ranges.
A. Using Region-Specific Adjustments:
- Highlights: Lift the upper part of the curve to brighten highlights without affecting shadows or midtones.
- Shadows: Lower the lower part of the curve to darken shadows while preserving highlights.
B. Precision with the Point Curve:
- Fine Control: Switch to the Point Curve mode for precise control over individual RGB channels.
- RGB Channels: Adjusting the Red, Green, and Blue channels independently offers nuanced color toning.
IV. Tone Curve Presets and Profiles:
Photographers can leverage tone curve presets and profiles to achieve specific looks or styles quickly.
A. Applying Presets:
- Built-In Presets: Many photo editing software includes preset tone curves for common adjustments like “Linear,” “Medium Contrast,” or “Strong Contrast.”
- Custom Presets: Users can create and save custom tone curve presets based on their preferred editing style.
B. Using Profiles:
- Creative Profiles: Some photo editing applications offer creative profiles that include predefined tone curve adjustments, providing a one-click solution for specific looks.
- User-Created Profiles: Photographers can create and save their profiles, incorporating tone curve adjustments tailored to their preferences.
V. Real-World Applications: Examples and Case Studies:
Let’s explore practical applications of the tone curve in real-world scenarios:
A. Portrait Enhancement:
- Highlights: Lift the highlights for a soft and glowing skin tone.
- Shadows: Darken shadows to add depth and definition to facial features.
B. Landscape Photography:
- Midtones: Adjust midtones to enhance the overall brightness and vibrancy of the landscape.
- S-Curve: Apply an S-curve to boost contrast and emphasize the details in the sky and foreground.
C. Product Photography:
- Highlights and Shadows: Fine-tune highlights and shadows to bring out the texture and details of the product.
- Color Channels: Utilize individual RGB channels for precise color adjustments.
VI. Tips for Efficient Tone Curve Editing:
Maximize the efficiency of your tone curve adjustments with these tips:
A. Use a Histogram as a Guide:
- Understand Histogram Peaks: Identify peaks in the histogram to pinpoint areas with intense tonal values.
- Avoid Clipping: Be cautious not to clip highlights or shadows, indicated by peaks touching the edges.
B. Non-Destructive Editing:
- Adjustment Layers: Utilize adjustment layers for non-destructive editing, allowing easy revisions without affecting the original image.
- Smart Objects: Convert layers to smart objects for added flexibility in tone curve adjustments.
C. Experiment and Compare:
- Before and After Views: Toggle between before and after views to evaluate the impact of tone curve adjustments.
- Create Virtual Copies: In Lightroom, create virtual copies to experiment with different tone curve settings.
D. Utilize Presets and Profiles:
- Efficient Workflow: Leverage presets and profiles to streamline your workflow, especially when working on a series of images.
- Customization: Tailor presets and profiles to your unique style and preferences.
VII. Conclusion:
In just five minutes, you’ve gained valuable insights into the world of the tone curve, a powerful tool that can transform your photos with precision and creativity. From basic adjustments to targeted enhancements, the tone curve offers a wealth of possibilities for photographers seeking to elevate their images. As you embark on your tone curve journey, remember that practice, experimentation, and a keen eye are key ingredients for mastering this essential aspect of photo editing. Whether you’re a beginner or an experienced photographer, the tone curve is your ally in achieving stunning and impactful visual results. Explore, experiment, and let the tone curve be your guide in shaping the tonal landscape of your photographic masterpieces.