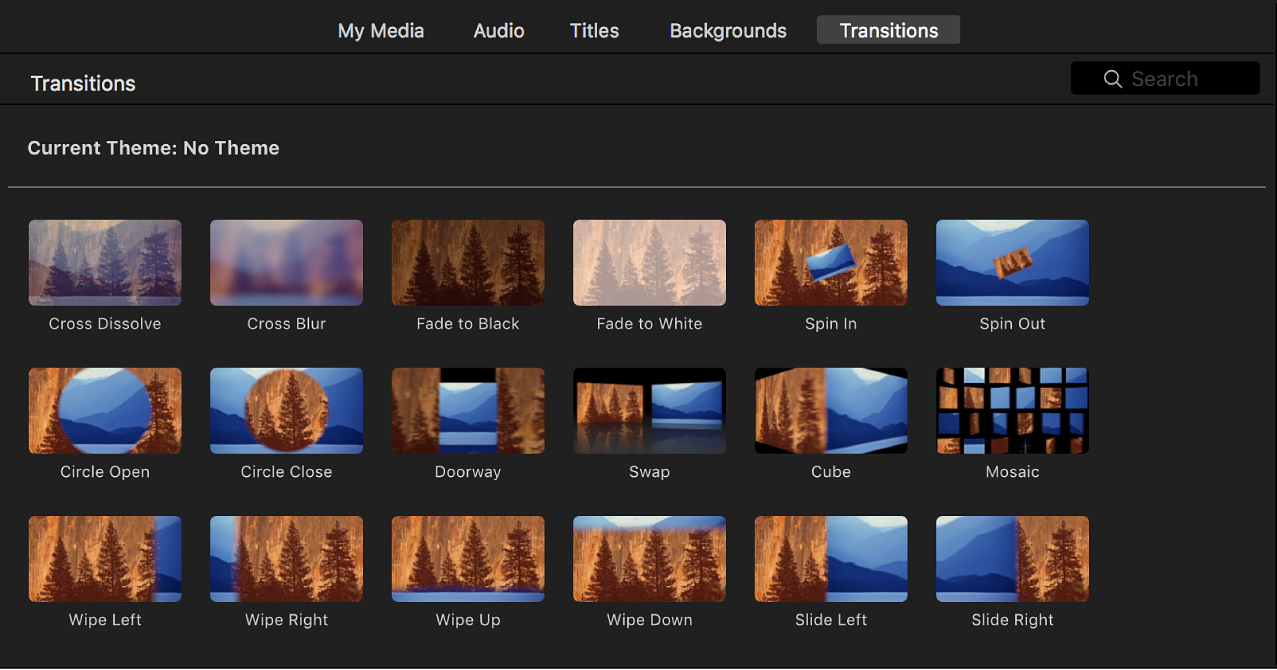
Transitions are an essential element in video editing, enhancing the visual flow and coherence of your project by smoothly transitioning between clips. iMovie, Apple’s user-friendly video editing software, offers a wide range of built-in transitions that allow creators to add professional polish to their videos with ease. In this comprehensive guide, we’ll explore the intricacies of adding transitions between clips in iMovie, uncovering techniques, workflows, and expert tips to help you master this essential aspect of video editing and elevate your projects to the next level.
Understanding Transitions in iMovie
Before we dive into the practical aspects, it’s important to understand the concept and significance of transitions in video editing. Transitions serve as visual bridges between two clips, seamlessly blending them together and creating a cohesive narrative flow. Whether it’s a simple fade, a dynamic wipe, or a playful spin, transitions can add flair, rhythm, and storytelling impact to your videos. In iMovie, transitions are applied between clips in the timeline and can be customized to suit your creative vision.
Step-by-Step Guide to Adding Transitions in iMovie
- Open Your Project in iMovie: Launch iMovie and open the project containing the clips between which you want to add transitions. If you haven’t already started a project, create a new one and import your video clips into the timeline.
- Navigate to the Transitions Browser: At the top of the iMovie interface, click on the “Transitions” button to open the transitions browser. This panel displays a variety of transition options categorized into different styles, such as Dissolve, Wipe, Fade, and more.
- Preview and Select a Transition: Scroll through the transitions browser to preview the available options. Click on a transition to preview its effect between two sample clips. Take your time to explore different styles and choose a transition that complements the mood and tone of your video.
- Apply the Transition: Once you’ve selected a transition, drag it onto the timeline between the two clips where you want it to appear. iMovie will automatically apply the transition effect, blending the two clips together with the selected transition style.
- Adjust the Transition Duration (Optional): By default, iMovie sets the duration of transitions to one second. However, you can adjust the duration of the transition to suit your preferences. Click on the transition in the timeline to select it, then drag the edge of the transition to lengthen or shorten its duration.
- Preview the Transition: After applying the transition, preview your project in the iMovie viewer to assess the visual impact and timing of the transition. Playback the sequence to ensure smooth transitions and seamless continuity between clips.
- Add Additional Transitions as Needed: Repeat the process to add transitions between other clips in your timeline. Experiment with different transition styles and durations to create engaging visual transitions that enhance the overall flow of your video.
- Fine-Tune Transitions with Precision Editor (Optional): For more precise control over transition timing and placement, use the precision editor in iMovie. Double-click on a transition in the timeline to open the precision editor, where you can adjust the transition handles to fine-tune the timing and alignment of the transition between clips.
- Preview and Playback: Continuously preview your project in iMovie to assess the visual flow and coherence of your video with transitions applied. Playback the sequence to ensure smooth transitions and seamless continuity between clips.
- Save and Export Your Project: Once satisfied with your edits and transitions, save your project in iMovie and export it in the desired format for sharing or distribution. Choose the appropriate output settings to ensure optimal video quality and compatibility with your intended playback platform.
Tips and Best Practices for Adding Transitions in iMovie
- Use Transitions Sparingly: While transitions can enhance the visual flow of your video, it’s important not to overuse them. Use transitions strategically to emphasize key moments or transitions in your narrative, rather than applying them indiscriminately.
- Match Transitions to the Tone and Style: Consider the tone and style of your video when choosing transitions. Select transitions that complement the mood and aesthetic of your project, whether it’s a subtle dissolve for a reflective moment or a dynamic wipe for a high-energy sequence.
- Experiment with Timing and Duration: Experiment with different transition durations to find the optimal timing for your project. Longer transitions can create a more gradual effect, while shorter transitions can add energy and pace to your video.
- Consider Cross-Dissolves for Natural Transitions: Cross-dissolves are a versatile and widely used transition style that can create smooth and natural transitions between clips. Consider using cross-dissolves for scenes with natural transitions, such as changes in time or location.
- Customize Transitions with Sound Effects (Optional): To enhance the impact of your transitions, consider adding sound effects or audio transitions. iMovie offers a variety of built-in sound effects that you can use to complement your visual transitions and create a more immersive viewing experience.
Conclusion
Adding transitions in iMovie is a simple yet powerful way to enhance the visual flow and coherence of your video projects. By following the steps outlined in this guide and embracing best practices, you’ll be well-equipped to leverage the full potential of transitions to elevate your videos and captivate your audience. Whether you’re creating a professional presentation, a family vacation montage, or a creative short film, iMovie provides the tools and capabilities you need to seamlessly blend clips together with engaging transitions. So, dive in, experiment fearlessly, and let transitions be your secret weapon in the pursuit of captivating storytelling in iMovie.