Introduction
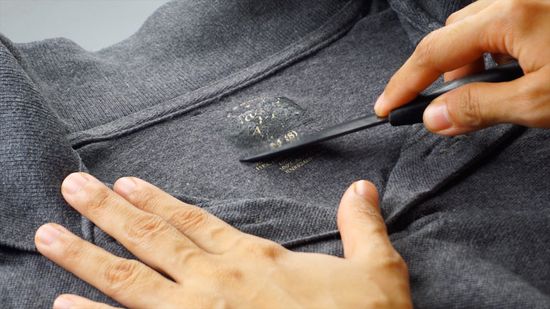
The frustration of dealing with ironed-on labels on clothing is a common experience. Whether it’s a stubborn brand label, size tag, or care instructions, removing these labels can be tricky. This comprehensive guide provides a step-by-step approach on how to effectively remove ironed-on labels from clothing, considering various fabrics and ensuring the process is gentle to avoid damage.
Section 1: Assessing the Fabric
1.1 Understanding Fabric Types
Different fabrics react differently to heat and adhesive removal methods. Before attempting to remove an ironed-on label, identify the fabric of the garment. Common fabrics include cotton, polyester, wool, silk, and blends. This information is crucial in determining the appropriate removal method to avoid damage.
Section 2: Tools and Materials
2.1 Basic Tools
Gather the following basic tools for label removal:
- Flat-edged tool (plastic scraper or credit card): For gently lifting the label.
- Clean cloth: To protect the fabric and absorb any residue.
- Adhesive remover or oil-based substance: Options include cooking oil, peanut butter, or commercial adhesive removers.
2.2 Optional Tools
Depending on the fabric type and label adhesion, you may consider:
- Hairdryer or iron: For applying heat to loosen the adhesive.
- Rubbing alcohol or acetone: To dissolve adhesive on certain fabrics (test on a small, inconspicuous area first).
Section 3: Heat Application Method
3.1 Preliminary Steps
- Check Label Instructions: Review care labels on the garment to ensure it can tolerate heat.
- Test an Inconspicuous Area: Before applying heat directly to the label, test a small, inconspicuous area of the fabric to check for adverse reactions.
3.2 Using a Hairdryer
- Set the hairdryer to medium heat.
- Hold the hairdryer about 2-3 inches away from the label.
- Gently heat the label for 20-30 seconds.
- Use the flat-edged tool to lift the label slowly.
- Wipe away any adhesive residue with a clean cloth.
3.3 Using an Iron
- Set the iron to a low heat setting without steam.
- Place a clean cloth over the label to protect the fabric.
- Iron over the cloth for 15-20 seconds.
- Use the flat-edged tool to lift the label carefully.
- Clean any adhesive residue with a cloth and adhesive remover.
Section 4: Adhesive Dissolving Method
4.1 Preliminary Steps
- Test on an Inconspicuous Area: Before applying any liquid to the label, test the substance on an inconspicuous part of the fabric to ensure compatibility.
4.2 Using Cooking Oil or Peanut Butter
- Apply a small amount of cooking oil or peanut butter to the label.
- Let it sit for 10-15 minutes to allow the oil to penetrate the adhesive.
- Gently rub the label with a clean cloth or the flat-edged tool.
- Wash the garment to remove any residual oil or peanut butter.
4.3 Using Commercial Adhesive Remover
- Apply a small amount of adhesive remover to the label.
- Follow the product instructions for the recommended wait time.
- Use the flat-edged tool to lift the label gently.
- Wipe away any remaining adhesive with a clean cloth.
- Wash the garment according to care instructions.
Section 5: Adhesive Evaporation Method
5.1 Preliminary Steps
- Test on an Inconspicuous Area: Before applying any liquid to the label, test the substance on an inconspicuous part of the fabric to ensure compatibility.
5.2 Using Rubbing Alcohol or Acetone
- Dampen a clean cloth with rubbing alcohol or acetone.
- Gently rub the label to saturate it with the liquid.
- Allow the alcohol or acetone to evaporate, which may take a few minutes.
- Use the flat-edged tool to lift the label carefully.
- Wipe away any remaining adhesive with a clean cloth.
- Wash the garment following care instructions.
Section 6: Post-Removal Care
6.1 Washing the Garment
After successfully removing the ironed-on label, it’s crucial to wash the garment to eliminate any remaining residue from oils, adhesive removers, or other substances used in the removal process. Follow the care instructions on the garment to ensure proper cleaning.
6.2 Inspecting for Damage
Inspect the fabric for any signs of damage, discoloration, or weakening. If the fabric appears altered, consider whether the garment can still be worn without noticeable flaws or if it needs further attention, such as patching or mending.
Conclusion
Removing ironed-on labels from clothing requires a delicate balance of heat, solvents, and patience. By following the appropriate method based on the fabric type and employing the right tools, you can successfully eliminate stubborn labels without causing damage to your garments. Remember to test any method on a small, inconspicuous area first and proceed with caution. With these techniques, you can unlabel your clothing with confidence and restore your garments to a label-free, pristine condition.