Warping in Ableton Live is a fundamental technique that allows producers, DJs, and musicians to manipulate audio clips in both creative and practical ways. Whether you’re aligning beats, adjusting tempo, or creating complex rhythmic patterns, mastering the art of warping opens up a world of sonic possibilities. In this extensive guide, we’ll explore every facet of using warping in Ableton Live, from understanding its core concepts to applying advanced techniques, empowering you to wield this powerful tool with precision and creativity.
Understanding Warping:
Before we delve into the specifics of warping in Ableton Live, let’s establish a foundational understanding of what warping is and why it’s important:
- What is Warping? Warping is the process of stretching or compressing audio clips to match the tempo and timing of a project. It allows users to manipulate the timing and tempo of audio recordings without affecting pitch, enabling seamless integration of diverse sources into a cohesive musical composition.
- The Importance of Warping: Warping plays a crucial role in music production, DJing, and live performance. It allows for the synchronization of audio clips with different tempos, the creation of remixes and mashups, and the correction of timing discrepancies in live recordings.
- Goals of Warping: The primary goals of warping are to achieve temporal alignment, rhythmic precision, and seamless integration of audio clips within a project. This involves adjusting the timing and tempo of audio clips to match the tempo of the project while preserving the original character and feel of the recordings.
Getting Started with Warping:
Now that we have a solid understanding of warping, let’s explore how to get started with using it in Ableton Live:
- Warping Audio Clips:
- To warp an audio clip in Ableton Live, simply drag and drop it from the browser into a track in the Arrangement or Session View.
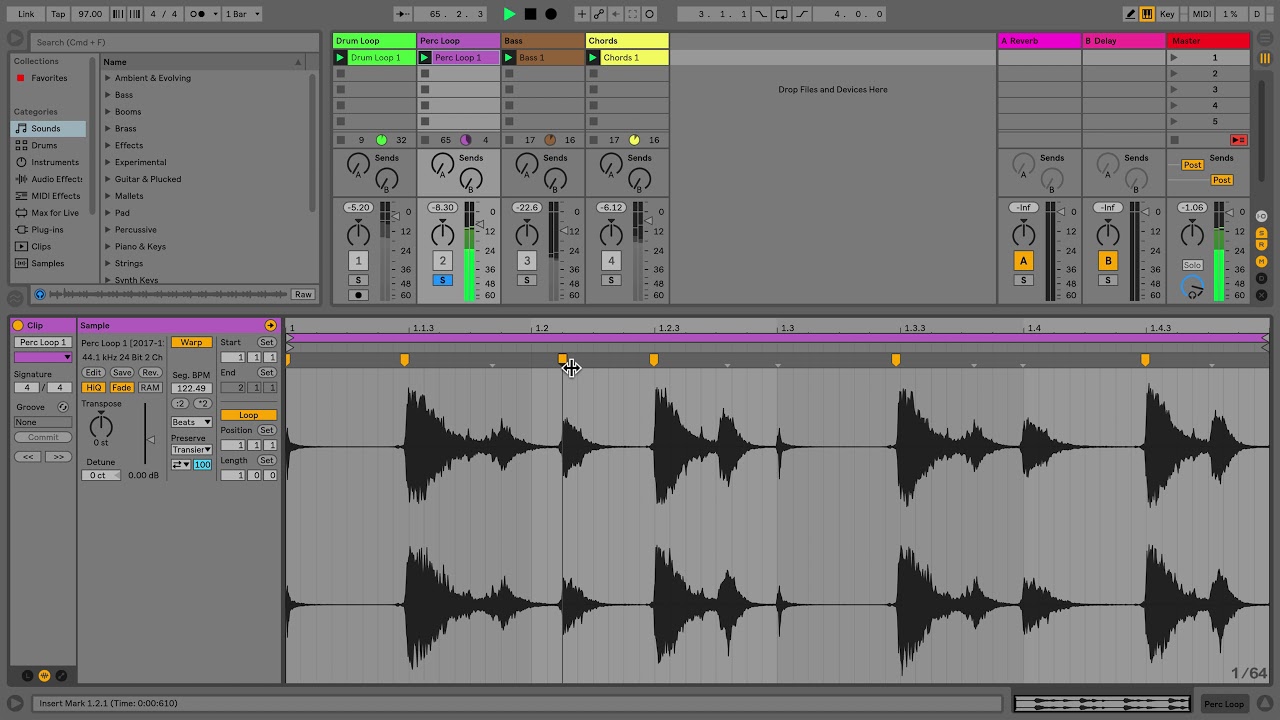
- Double-click on the audio clip to open it in the Clip View, then enable the “Warp” button to activate warping mode.
- Ableton Live will analyze the audio clip and display a waveform with transient markers, which indicate the timing of important rhythmic elements such as beats and transients.
- Adjusting Warp Markers:
- To adjust warp markers, simply click and drag them to the desired position on the waveform. Use the warp markers to align transients with the grid or adjust the timing of specific beats or notes.
- Double-click on a warp marker to open the “Warp Marker” menu, which allows you to fine-tune the timing and behavior of the marker.
- Setting Warp Modes:
- Ableton Live offers several warp modes, each optimized for different types of audio material. Experiment with different warp modes to find the one that best suits your audio clip.
- Common warp modes include Beats, Complex, Complex Pro, and Texture. Beats mode is ideal for rhythmic material with clear transients, while Complex and Complex Pro are better suited for melodic or harmonic material with complex tonal characteristics.
Advanced Techniques and Workflow Tips:
Now that we’ve covered the basics of warping in Ableton Live, let’s explore some advanced techniques and workflow tips to enhance your productivity and creativity:
- Transient Detection and Editing:
- Use Ableton Live’s transient detection feature to automatically detect and place warp markers at transient points in the audio waveform. This can speed up the warping process for audio clips with clear rhythmic elements.
- Fine-tune the placement of warp markers manually to ensure precise alignment and timing of transients with the grid.
- Complex Warping Scenarios:
- For audio clips with complex rhythmic or tonal characteristics, experiment with combining multiple warp modes and adjusting individual warp markers to achieve the desired result.
- Use the “Envelope” warp mode to apply tempo-based envelopes to audio clips, allowing for dynamic tempo changes and rhythmic effects.
- Warping Multitrack Recordings:
- When working with multitrack recordings or stems, warp each track individually to ensure accurate alignment and timing across all elements of the mix.
- Group related tracks together and warp them as a group to maintain synchronization and coherence between different elements of the mix.
Integrating Warping into Your Workflow:
As you become more comfortable with warping in Ableton Live, consider integrating it into your overall music production workflow in the following ways:
- DJing and Remixing:
- Use warping to synchronize and blend audio tracks seamlessly in DJ sets or live performances. Warp tracks to match the tempo of your DJ mix or remix them on the fly to create mashups and re-edits.
- Experiment with creative warping techniques such as tempo ramps, stutter effects, and time-stretching to add excitement and variation to your DJ sets and performances.
- Music Production and Composition:
- Incorporate warping into your music production workflow to integrate diverse audio sources into your compositions. Warp samples, loops, and recordings to match the tempo and feel of your project, allowing for seamless integration and layering of different elements.
- Use warping creatively to experiment with tempo changes, rhythmic variations, and time-stretching effects, adding depth and complexity to your musical arrangements.
- Sound Design and Experimental Music:
- Explore the creative potential of warping for sound design and experimental music production. Warp audio clips beyond recognition to create abstract textures, atmospheric drones, and otherworldly soundscapes.
- Combine warping with audio effects processing, modulation, and synthesis techniques to push the boundaries of conventional music production and explore new sonic territories.
Conclusion:
Warping in Ableton Live is a versatile and powerful tool for manipulating audio clips in both creative and practical ways. By mastering its features, techniques, and workflow, you’ll unlock a world of sonic possibilities for music production, DJing, and live performance.
Whether you’re aligning beats, adjusting tempo, or creating complex rhythmic patterns, warping in Ableton Live provides the tools and flexibility needed to bring your musical ideas to life with precision and creativity. So, dive in, experiment, and let the boundless creativity of warping inspire your musical journey in Ableton Live!