Introduction:
Look-Up Tables (LUTs) have become indispensable tools in modern color grading workflows, offering a quick and efficient way to apply color transformations and achieve specific looks or styles in footage. DaVinci Resolve, renowned for its advanced color grading capabilities, provides robust support for LUTs, allowing users to integrate them seamlessly into their projects. In this extensive guide, we’ll delve deep into the art of using LUTs in DaVinci Resolve, providing you with the knowledge and techniques to master this essential aspect of color grading.
Understanding Look-Up Tables (LUTs):
A Look-Up Table (LUT) is a mathematical formula or set of instructions that maps one set of color values to another. In the context of color grading, LUTs are used to transform the color and tonal characteristics of footage, applying predefined color corrections or stylistic adjustments to achieve a specific look or aesthetic.
Types of LUTs:
- Technical LUTs:
- Technical LUTs are designed to perform specific color transformations, such as converting between color spaces or correcting for gamma and color temperature variations.
- These LUTs are often used for technical purposes, such as standardizing color workflows or ensuring consistency across different devices or platforms.
- Creative LUTs:
- Creative LUTs are artistic tools that apply stylized color grading effects or emulate the characteristics of specific film stocks, looks, or cinematic styles.
- These LUTs are widely used in filmmaking, photography, and video production to achieve unique and distinctive visual aesthetics.
Using LUTs in DaVinci Resolve:
Let’s explore the step-by-step process of using LUTs in DaVinci Resolve to enhance the visual quality and aesthetic appeal of your footage:
- Accessing LUTs:
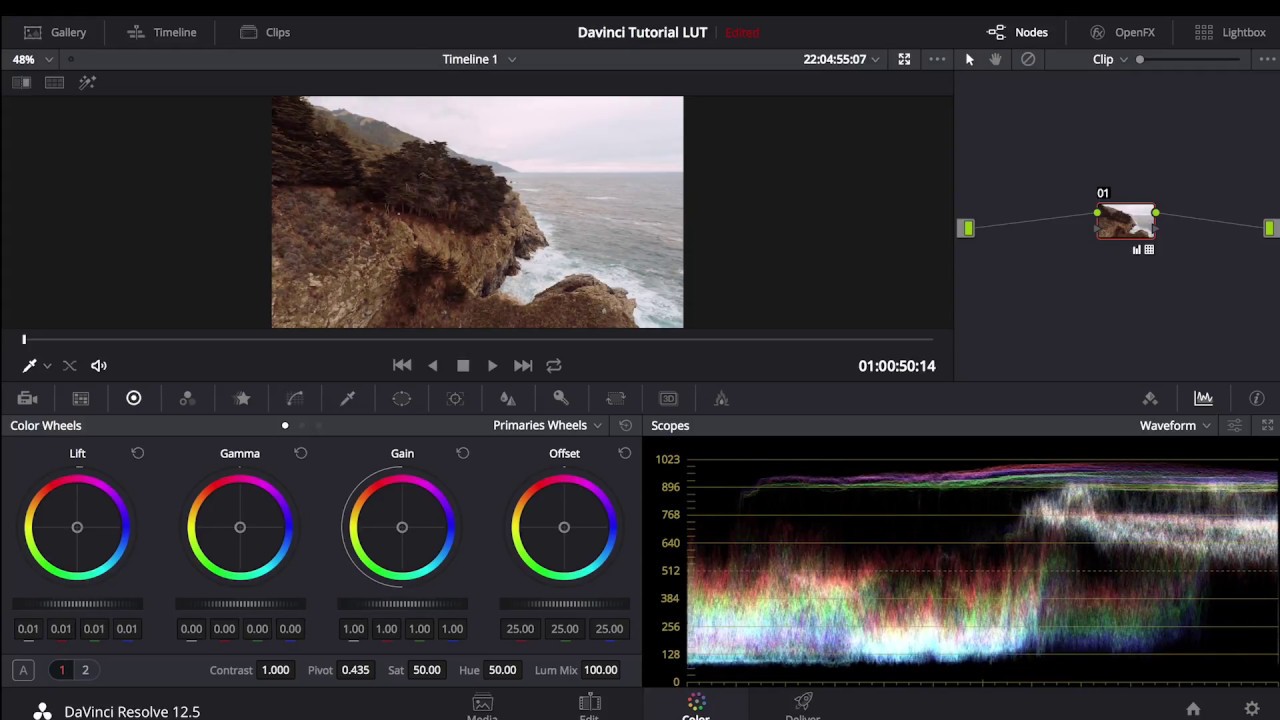
- Launch DaVinci Resolve and open your project. Navigate to the Color page by clicking on the Color tab at the bottom of the interface. This will bring up the Color page, where you can access the color grading tools, including LUTs.
- Loading LUTs:
- In the Color page, locate the LUTs panel, usually situated on the right side of the interface. Here, you’ll find options to load and apply LUTs to your footage.
- Click on the LUT dropdown menu to browse through the available LUTs in your system. DaVinci Resolve provides a selection of built-in LUTs, but you can also import custom LUTs created or downloaded from external sources.
- Applying LUTs:
- Once you’ve selected a LUT from the dropdown menu, click on it to apply it to your footage. DaVinci Resolve will automatically apply the selected LUT to the active node, affecting the color and tonal characteristics of the footage accordingly.
- You can apply LUTs to individual clips, adjustment layers, or specific nodes within your color grading workflow, allowing for targeted and flexible application of color transformations.
- Adjusting LUT Intensity:
- After applying a LUT, you may want to adjust its intensity or strength to fine-tune the color grading effect. Use the LUT Intensity slider located in the LUTs panel to control the strength of the applied LUT.
- By adjusting the intensity slider, you can dial in the desired level of color correction or stylization, balancing the effect of the LUT with the original appearance of the footage.
- Previewing LUTs:
- As you apply and adjust LUTs, observe the real-time changes reflected in the viewer window. DaVinci Resolve provides various viewing options, including split-screen views and before-and-after comparisons, to help you evaluate the effect of the applied LUT on your footage.
- Saving and Exporting:
- Once you’re satisfied with the color grading adjustments using LUTs, save your project and export your footage to your desired format for further editing or distribution. DaVinci Resolve will apply the selected LUTs to the exported footage, ensuring consistency in the final output.
Best Practices for Using LUTs:
To optimize your workflow and achieve professional-grade results when using LUTs in DaVinci Resolve, consider the following best practices:
- Choose LUTs Wisely:
- Select LUTs that complement the visual style and aesthetic goals of your project. Consider factors such as genre, mood, and storytelling objectives when choosing LUTs to ensure they align with your creative vision.
- Experiment with LUTs:
- Don’t be afraid to experiment with different LUTs to explore their effects and discover new creative possibilities. Try applying multiple LUTs in combination or adjusting their intensity to achieve custom looks and stylizations.
- Fine-Tune as Needed:
- After applying a LUT, fine-tune its intensity and adjust other color grading parameters as needed to achieve the desired result. LUTs serve as starting points for color grading, but additional adjustments may be necessary to tailor the effect to your specific footage and preferences.
- Understand LUT Compatibility:
- Be mindful of LUT compatibility issues, especially when using LUTs created for specific camera profiles or color spaces. Ensure that the selected LUTs are compatible with your footage’s color space and format to avoid unexpected color shifts or artifacts.
- Create Custom LUTs:
- Consider creating custom LUTs tailored to your specific project requirements and creative preferences. DaVinci Resolve provides tools for creating and exporting custom LUTs based on your color grading adjustments, allowing for personalized and consistent color treatments.
Conclusion:
LUTs are powerful tools for achieving creative and technical color transformations in DaVinci Resolve. By integrating LUTs into your color grading workflow, you can enhance the visual quality, mood, and storytelling impact of your footage with precision and efficiency. Whether you’re working on a narrative film, documentary, commercial, or music video, the ability to use LUTs effectively is essential for achieving professional-grade results and realizing your creative vision. Experiment with different LUTs, fine-tune their settings, and explore their effects to unlock new creative possibilities and elevate your color grading skills in DaVinci Resolve.