Introduction:
Ghosting an image in Photoshop is a fascinating technique that infuses a sense of ethereal beauty and otherworldly charm into your digital creations. Whether you’re aiming to create hauntingly beautiful portraits or evoke a dreamlike atmosphere in your photography, this comprehensive guide will navigate through the intricate steps of ghosting an image using Adobe Photoshop. Join us on this journey as we explore the tools, techniques, and creative nuances that will empower you to master the art of ethereal ghosting.
Section 1: Understanding Ghosting and its Artistic Appeal
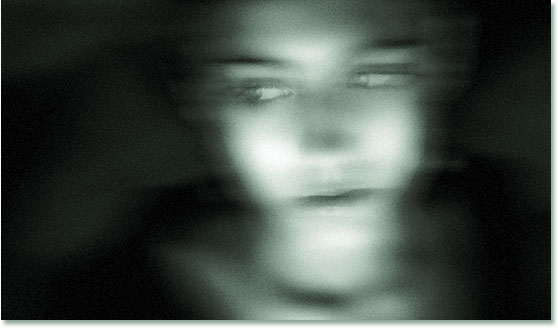
Ghosting, in the context of image editing, involves creating semi-transparent, faded, or ethereal duplicates of a subject within an image. This technique is often employed to evoke a sense of mystery, nostalgia, or a dreamlike quality. Ghosted images can convey a narrative, suggesting the presence of fleeting memories or spectral entities within the composition.
Section 2: Selecting the Right Image
Before delving into the technicalities of ghosting, carefully choose an image that aligns with the desired mood and narrative. Consider images with strong compositions, distinct subjects, and a sense of depth, as these elements will contribute to the effectiveness of the ghosting technique.
Section 3: Duplicating the Background Layer
To begin the ghosting process, open Adobe Photoshop and import your chosen image. Start by duplicating the background layer to create a new layer that will serve as the foundation for the ghosting effect. This step ensures you preserve the original image for reference or further adjustments.
Section 4: Creating Duplicate Layers for Ghosting
Step 1: Duplicate the Subject
Isolate the subject within your image by using selection tools such as the Lasso Tool or Pen Tool. Once selected, duplicate the subject onto a new layer. This layer will become the “ghost” and should be positioned above the background layer.
Step 2: Adjusting Opacity
Reduce the opacity of the duplicated subject layer to create a semi-transparent effect. This step is crucial for achieving the ghosting aesthetic. Experiment with opacity levels to find the right balance, allowing the ghosted image to be visible without overpowering the original subject.
Step 3: Adding Blur for a Dreamlike Quality
Apply a Gaussian Blur to the duplicated subject layer to introduce a dreamlike and ethereal quality. Adjust the blur radius based on the desired level of softness. This step enhances the illusion of a ghost or fleeting presence within the composition.
Section 5: Fine-Tuning the Ghosted Image
Step 1: Erasing and Masking
Refine the ghosted effect by using the Eraser tool or layer masks to selectively erase or mask areas of the duplicated subject. This step allows you to control the transparency and blending of the ghosted image, ensuring a seamless integration with the original subject.
Step 2: Adjusting Hue/Saturation
Experiment with the Hue/Saturation adjustment to subtly alter the color tones of the ghosted image. This adjustment adds an extra layer of surrealism and contributes to the overall ethereal atmosphere.
Step 3: Introducing Light Effects
Enhance the ghosting effect by introducing subtle light effects. Create a new layer and use brushes or gradients to paint soft glows or light streaks around the ghosted image. Adjust the layer blending modes and opacities to achieve a luminous and otherworldly appearance.
Section 6: Replicating and Composing Multiple Ghosts
To create a more complex and intriguing composition, consider replicating the ghosting process for multiple elements within the image. Duplicate the layers, adjust opacities, and experiment with different blur levels to introduce a dynamic interplay of ghosted figures or elements.
Section 7: Blending with Background Elements
Ensure a harmonious integration of the ghosted images with the background elements. Adjust the overall color balance, contrast, and saturation to create a cohesive and unified composition. Fine-tune the ghosting layers to interact seamlessly with the surroundings, enhancing the overall visual impact.
Section 8: Creating Depth and Atmosphere
To amplify the ethereal quality of your composition, introduce depth and atmosphere. Consider adding subtle gradients, haze, or atmospheric effects to convey a sense of space and distance. This step contributes to the dreamlike and immersive nature of the ghosting effect.
Section 9: Applying Final Adjustments
Step 1: Global Adjustments
Apply global adjustments to the entire image to refine the overall tone and mood. Experiment with levels, curves, or additional color grading to achieve the desired atmosphere. Ensure that the ghosting effect integrates seamlessly into the overarching aesthetic.
Step 2: Final Touches
Add any final touches or creative enhancements to further elevate the impact of your ghosted image. This may include additional textures, overlays, or subtle details that contribute to the overall narrative and emotion conveyed by the composition.
Section 10: Saving and Showcasing Your Ghosted Masterpiece
Once satisfied with the ghosting effect, save your masterpiece. Consider creating different versions with varying degrees of ghosting or additional elements for a diverse portfolio. Share your ghosted creation on digital platforms, social media, or incorporate it into your artistic portfolio to showcase your mastery of this enchanting and evocative technique.
Conclusion:
Ghosting an image in Photoshop is a mesmerizing artistic technique that invites you to explore the realms of mystery and ethereal beauty. This comprehensive guide has provided a detailed roadmap for navigating through the steps of creating ghosted images, from selecting the right image to fine-tuning and showcasing the final masterpiece. As you embark on your journey to master the art of ethereal ghosting, let your creativity soar, and breathe life into your digital creations with the hauntingly beautiful allure of ghosted imagery.